
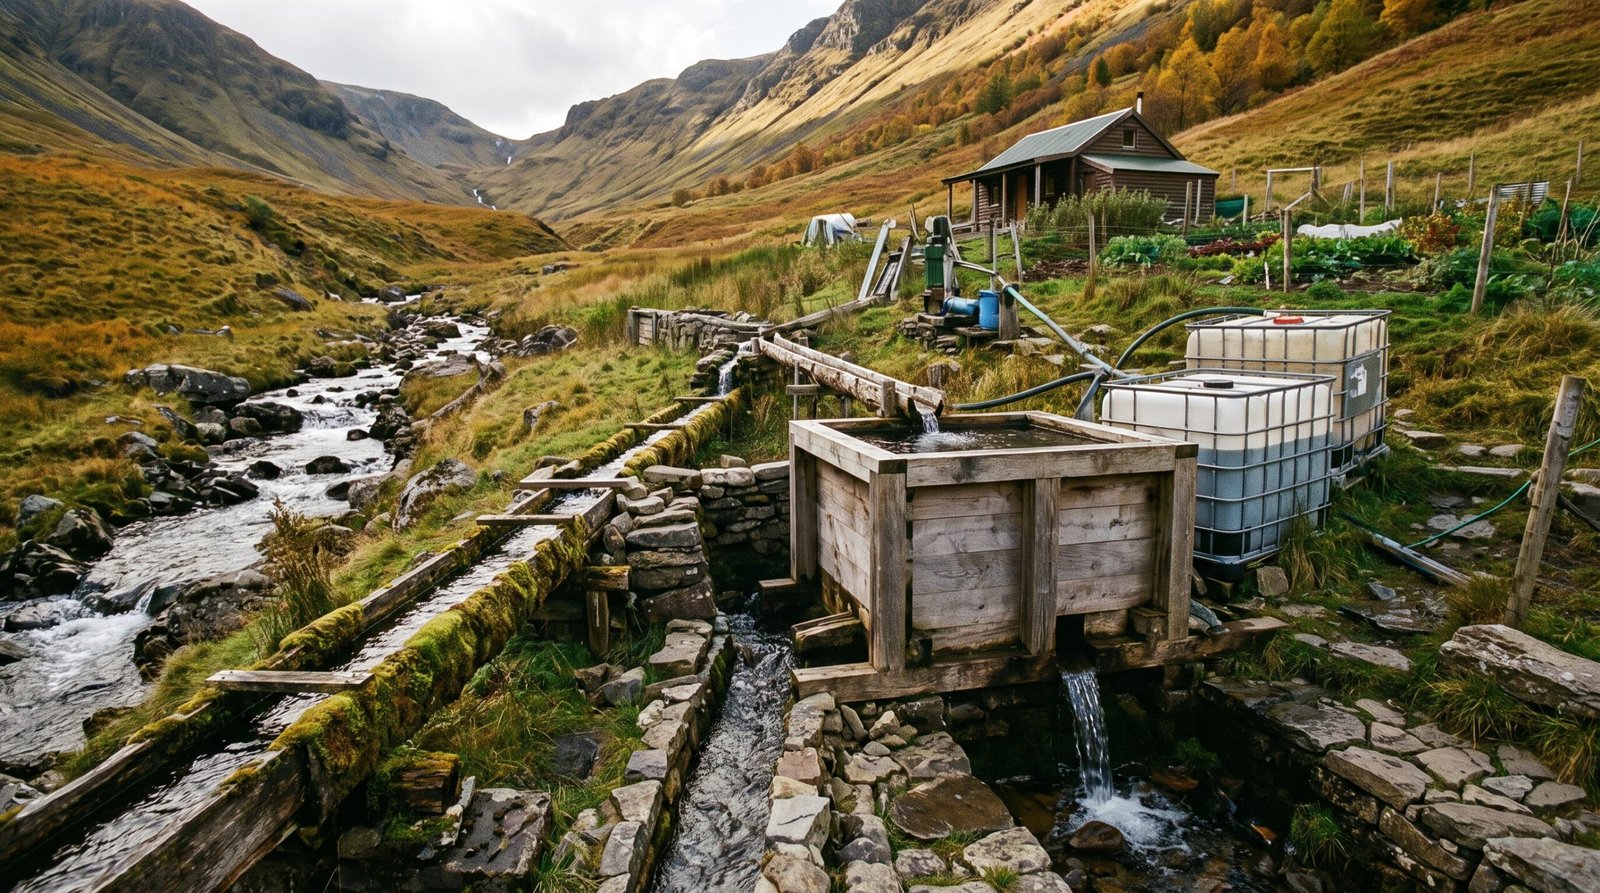
There’s a specific kind of quiet that settles over you the first time you turn on a tap in a remote cabin and clean water actually comes out. No municipal bill, no boil advisory, no wondering if the well truck can make it up your driveway in February. Just water, on your terms, whenever you need it.
That peace of mind doesn’t happen by accident. It’s engineered. And it’s the entire reason this guide exists — to walk you through building a water system that won’t fail you when you’re forty miles from the nearest hardware store.
Why Off-Grid Water Systems Demand More Respect Than Solar Panels
Everyone obsesses over solar arrays and battery banks when they go off-grid. Water gets treated like an afterthought, which is backwards. You can survive a cloudy week with a generator backup. You cannot survive a contaminated water source or a frozen, cracked storage tank in January.
A proper off-grid water system is really three systems stacked together: collection, storage, and filtration. Miss one piece and the other two are useless. I’ve seen beautifully built rainwater harvesting cabin setups fail completely because someone skipped a first-flush diverter and ended up with roof grit and bird droppings sitting in their main tank for a season.
Get the fundamentals right from day one and you’ll spend your off-grid years enjoying the property instead of babysitting a broken system every other weekend.
Rainwater Harvesting for a Cabin: The Collection Side
Your roof is your reservoir. A standard metal roof will shed roughly 0.6 gallons of water per square foot per inch of rainfall. Do the math on a 1,200 square foot roof during a decent storm and you’ll understand why rainwater harvesting cabin systems are so popular — the volume potential is enormous, even in moderate climates.
Roofing Material Matters More Than You Think
Standing seam metal roofing is the gold standard for potable rainwater harvesting. It’s non-porous, doesn’t leach chemicals, and sheds water fast with minimal debris retention. Avoid asphalt shingles for drinking water collection — they leach particulates and can harbor bacteria in the granules, especially in the first few years after installation.
If you’re stuck with an existing shingle roof, that’s fine for irrigation, flushing toilets, or laundry, but route that water to a separate storage tank than your drinking supply.
Gutters, First-Flush Diverters, and Screens
Half-round gutters outperform K-style for debris shedding. Pair them with a leaf screen and, critically, a first-flush diverter. This simple PVC device captures the first few gallons of any rain event — the water that’s carrying roof dust, pollen, and bird waste — and diverts it away from your main tank before clean water flows through.
Size your diverter using this rule of thumb: 1 gallon of diversion capacity for every 100 square feet of roof surface. Skimp here and you’re contaminating your entire storage volume with every single storm.
Off-Grid Water Storage: Tanks, Placement, and Winterizing
Storage is where most beginners get overconfident. They buy a tank, plunk it down, and assume gravity and plastic will handle the rest. Off grid water storage is actually a discipline with real engineering behind it.
Choosing Tank Material
Food-grade polyethylene tanks are the standard for most cabins — UV-stabilized, BPA-free, and available from 50 gallons up to 10,000+ gallon cisterns. For colder climates, consider a partially or fully buried tank below the frost line, which the EPA’s rainwater harvesting research notes significantly reduces both freeze risk and algae growth from UV exposure.
Steel tanks with liners work well for larger installations but require more maintenance vigilance around corrosion points at fittings.
Insulation and Freeze Protection
Above-ground tanks in freezing climates need real insulation, not an afterthought tarp. Wrap tanks in rigid foam board (2 inches minimum, R-10 or better) and consider a tank heater cable rated for the tank’s gallon capacity if you’re in a zone that regularly drops below 20°F.
Bury your supply lines below the frost line — typically 12 to 48 inches depending on your region — and insulate any exposed sections with foam pipe sleeves rated for outdoor use.
Sizing Your Storage Correctly
- Minimum daily need: Plan for 20-30 gallons per person per day for basic off-grid living (drinking, cooking, minimal hygiene).
- Drought buffer: Store at least 30-45 days of supply if you’re in a region with unpredictable rainfall patterns.
- Redundancy: Two smaller tanks beat one giant tank — if one needs cleaning or repair, you’re never without water entirely.
Filtration: The Step That Actually Keeps You Safe
Collection and storage get you volume. Filtration is what actually protects your health, and it’s not a place to cut corners or trust a single-stage carbin filter you found at a big box store.
Building a Multi-Stage Filtration Train
A serious off-grid water systems setup runs water through multiple stages before it ever touches a glass:
- Sediment pre-filter: 20-micron down to 5-micron, removes grit, rust flakes, and roof debris.
- Gravity water filter: Removes bacteria, protozoa (like Giardia and Cryptosporidium), and heavy metals without needing electricity or water pressure.
- UV sterilization (optional but recommended): For an added layer against viral contamination, especially if your source water quality is inconsistent.
A gravity water filter is the backbone of most off-grid setups because it works with zero power input — a massive advantage when your solar bank is low or your pump fails. This is exactly the kind of redundancy that lets you sleep well during a three-day storm.

- The system has only two installation hole for carbon filters, limit 2 carbon filers with 2 fluoride only.
- Certification, large capacity: The Waterdrop gravity-fed water filter system features a large 2.25-gallon capacity, satisfying the demand for...

For point-of-use backup, especially if you’re hauling water manually from a spring or creek during a dry spell, a compact portable filtration pump is worth having in your emergency kit regardless of how solid your main system is.
Testing Your Water — Don’t Skip This
Get your water tested annually, even if it tastes and looks fine. Bacteria like E. coli don’t announce themselves with a funny smell. The CDC’s guidance on private water testing recommends checking for coliform bacteria, nitrates, and pH at minimum once per year, with more frequent testing if you notice any change in taste, color, or if there’s been flooding nearby.
Common Off-Grid Water System Failures (And How to Prevent Them)
Most water system failures aren’t dramatic. They’re slow, quiet problems that snowball because nobody was looking.
Algae Growth in Tanks
Sunlight plus standing water equals algae, even in a “sealed” tank if there’s any light penetration through translucent walls or loose lids. Use opaque, UV-resistant tanks and make sure every access port has a tight, light-blocking seal.
Frozen or Cracked Pipes
This is the most common winter disaster in off-grid water systems. Heat-traced pipes, proper burial depth, and insulated exterior runs prevent 90% of these failures. Always have a plan to drain exterior lines completely if you’ll be away from the cabin during a hard freeze.
Pump Failure at the Worst Moment
If your system relies on a 12V DC pump for pressure, keep a spare on hand. They’re inexpensive relative to the disaster of being without pressurized water, and they do fail — usually during the coldest week of the year, because that’s how pumps work.
Your 30-Day Off-Grid Water System Maintenance Checklist
Peace of mind isn’t a one-time purchase — it’s a habit. Run through this checklist monthly and you’ll catch small issues before they become expensive, or worse, dangerous.
- Days 1-2: Inspect gutters and screens for leaf buildup or nesting debris.
- Day 5: Check the first-flush diverter and empty/clean it.
- Day 8: Visually inspect tank exterior for cracks, UV degradation, or insulation gaps.
- Day 10: Test water clarity and smell at the tap — note any changes.
- Day 14: Replace or clean sediment pre-filter if flow rate has slowed.
- Day 18: Inspect gravity water filter element for buildup; clean per manufacturer instructions.
- Day 21: Check exposed pipe insulation and heat cables for wear or exposure.
- Day 24: Confirm backup pump is functional with a quick test run.
- Day 27: Check tank fittings and valves for slow leaks or corrosion.
- Day 30: Log your total water usage for the month and compare against storage reserves.
Stick to this rhythm and your off-grid water systems will quietly do their job for years. That’s really the whole point — not fighting your water supply, but trusting it completely, so you can get back to actually living out there instead of worrying about it.
Ultimo aggiornamento 2026-10-28 / Link di affiliazione / Immagini da Amazon Product Advertising API